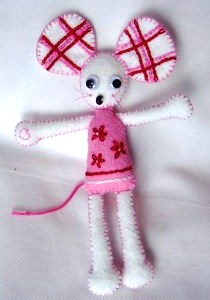
Read my friend, Donna's adventures cutting fabric with the Sizzix Big Kick over at Craft Critique HERE.
She found that those little thin dies you see all over the craft stores do not cut even the thinnest fabric, so I guess I purchased the right kind of system for my needs. Donna even made a cute penny rug with her die cut felt circles. I like the way hand stitching softens the slick perfection of die cut things.
Friday, February 29, 2008
Thursday, February 28, 2008
Using Japanese Pattern Books - A Tutorial
Since I love preaching the gospel of Japanese Pattern Books, I thought I'd give a little tutorial about my process finding and making felt stuffie patterns from these books. If your computer can't handle lots of pictures, you probably don't read my blog. To paraphrase Amy Sedaris: I use big pictures for illiterate people.
I'm looking for felt food patterns for my new swap partner. I love these little books. ISBN 4834763897
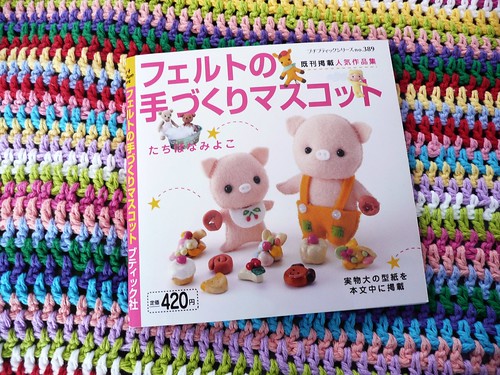
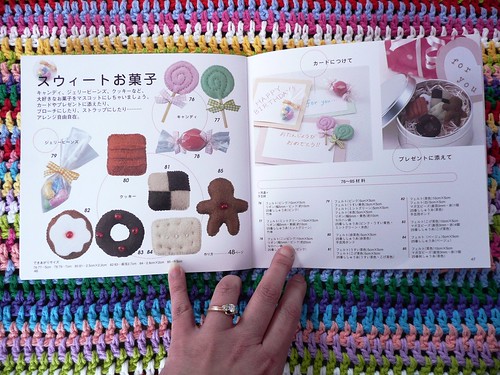
Aha! Food patterns! They look cute and easy, but I've made all these before and they are sort of miniature.
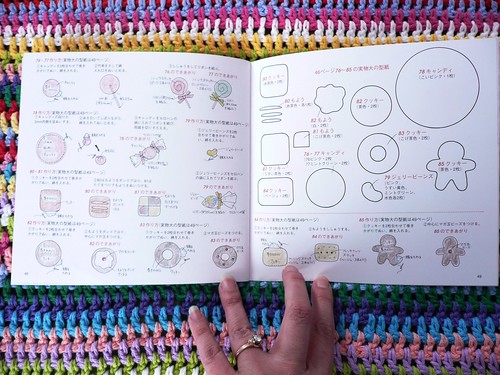
This book and others like it have the full sized patterns right there on a separate page. The instructions are on the left side.
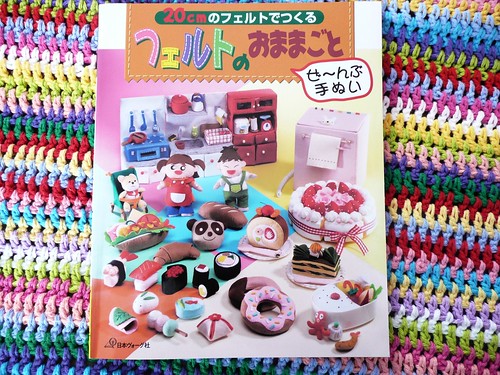
That other little book is cute, but I have a book with food patterns galore. This is ISBN 9784529042659
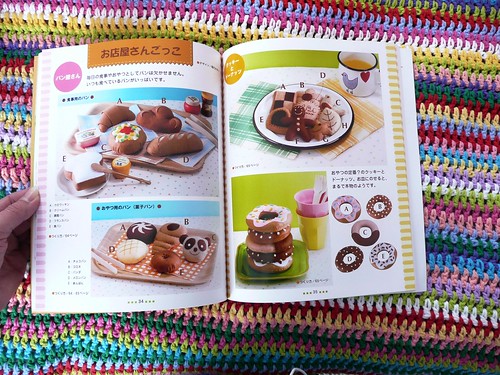
There's hot dogs, hamburgers, cakes, sushi, and much more in this book, but let's try some of those breads. My partner lives in Malaysia, so maybe that Western style slice of white bread will be a good place to start. (And easy enough for this tutorial)
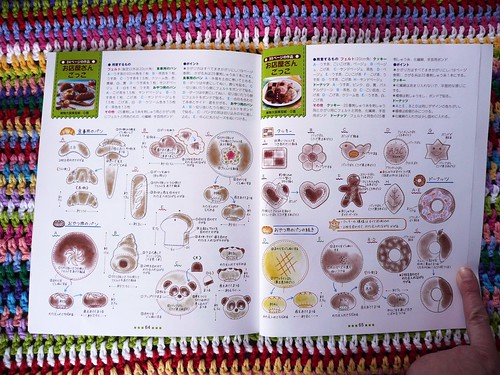
In the back of this book there is a page with the instructions for breads. My bread slice is in the center of the left page. This book is helpful because it has a thumbnail of the bigger photo inspiration page up in each corner.
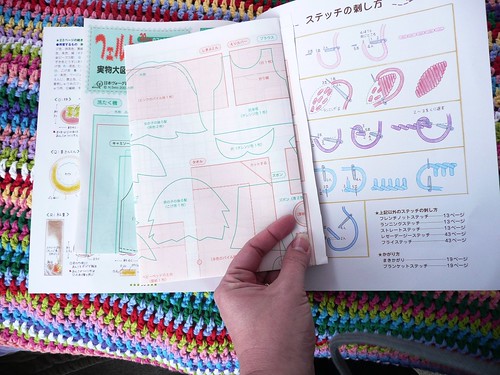
Okay, that was the easy part.. now I have to go to these inserts and find the patterns for my slice of bread. This book has two inserts that are printed on both sides.
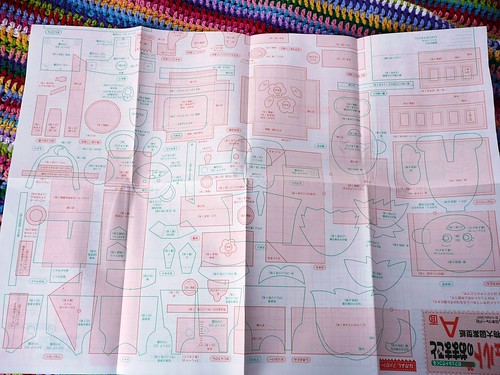
Yipes! I can't read any of this, but I do know that they usually organize the patterns in groupings according to how they are presented in the book.
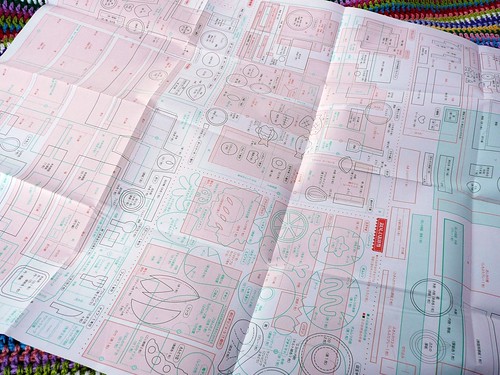
Egad! This sort of thing is for people with very strong visual perceptual skills, the sort of folks who do well on the section of an aptitude test that measures spatial reasoning. You may be this sort of person if you love putting together Ikea furniture or gas grills.
This is me all the way, so I can see pretty quickly that that bread slice shape is not on this page.
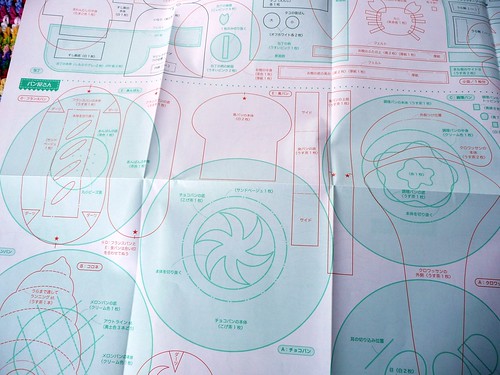
Aha! There it is on the other insert! I can see how this thing will go together. I should cut two white slice shapes and those two long strips will be like gussets, the longer one will stitch along the rounded top and the short one will go around the square bottom.
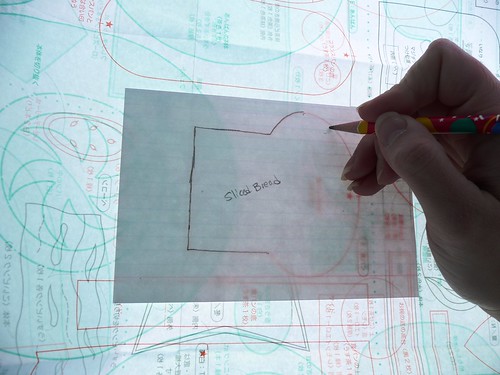
I trace the shapes onto card stock or white paper. My friend uses a different method, she traces onto tissue or tracing paper and cuts the paper and the felt all together.
Use your lightbox if you have one. I use the sunny window. If it's nighttime, I use the television screen.
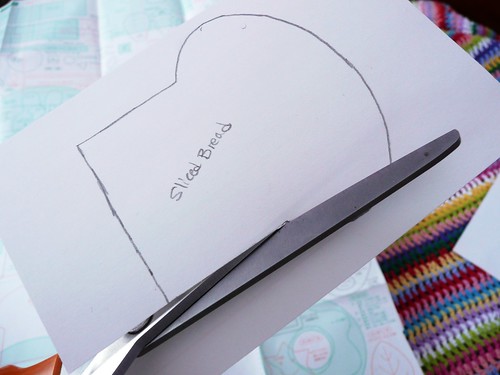
Cut out your cardstock template.
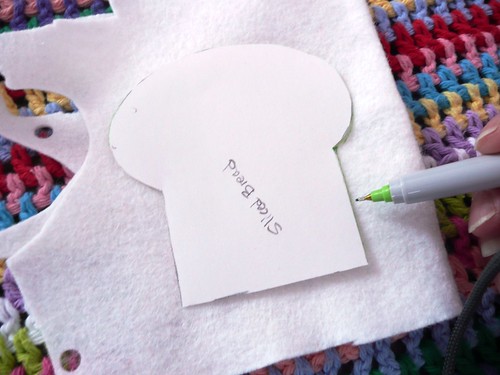
Trace onto felt using a light marker or disappearing marker. Layer your felt so you cut 2 shapes at once.
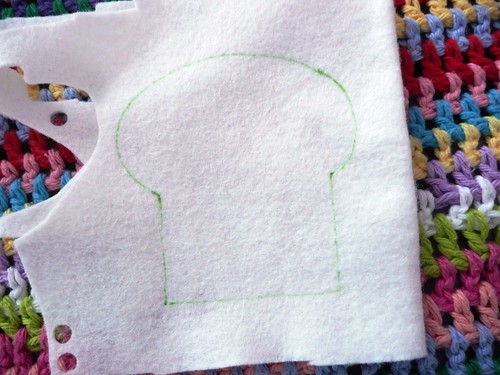
I used a Sharpie... I just carefully trim off any leftover color and turn this side to the inside of my object.
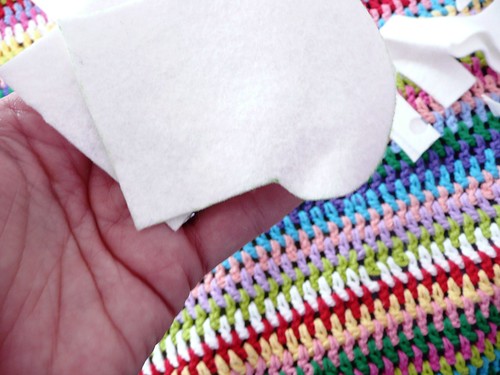
Two white bread shapes. I'll bevel off that little green spot with my scissors.
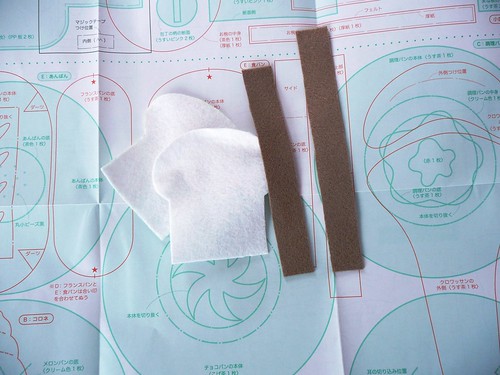
Parts are all cut! Time to start stitching!
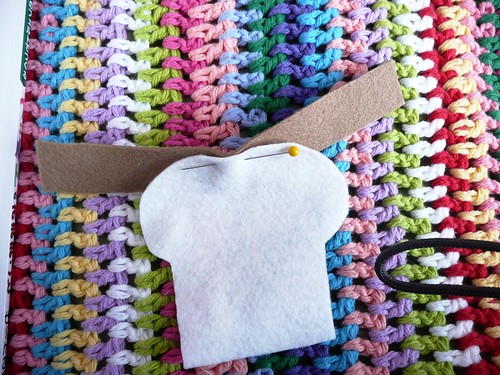
I matched up the center of the brown piece with the center top of the bread slice and I started stitching there.
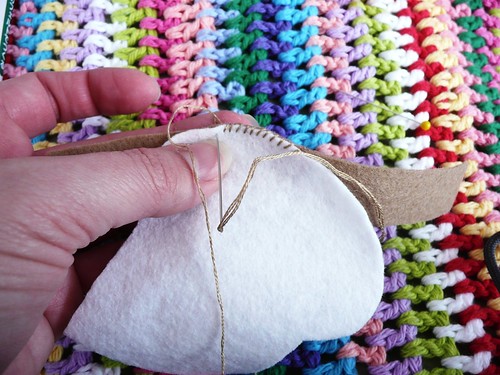
I use the whip stitch, although blanket stitching is my favorite. I'm using 2 strands of embroidery floss. Floss separates into six separate strands. I use about a 24-inch length on my needle.
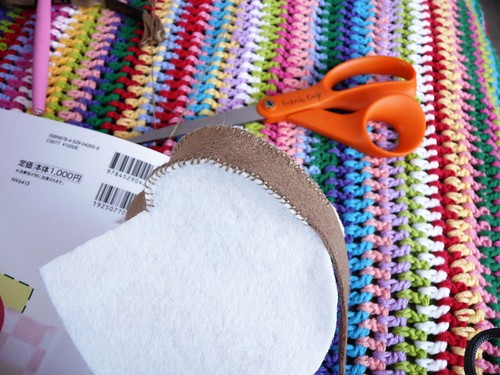
Here I've done two matching sides. I'm trying to keep it from going wonky by making sure it'll be lined up.
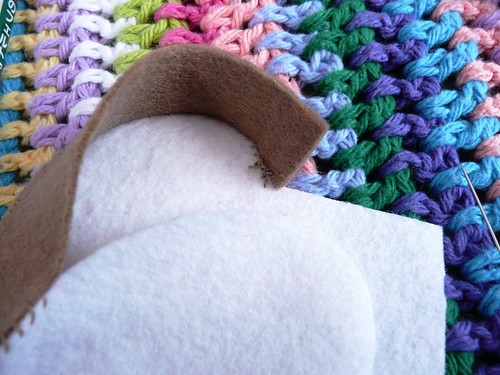
Hide your knots on the underside. I like to keep my knots close to the seam.
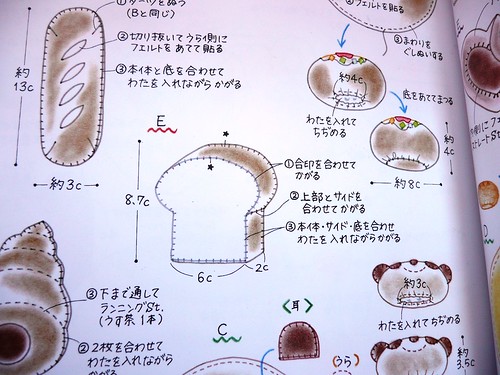
But wait.. let's look and see if there are any special instructions for this thing.
Nope .. no special instructions... I can see where the seams are supposed to go. Again, I can't read Japanese at all. I can read that this is pattern letter "E". That might have helped me find the pattern on the inserts a little bit earlier.
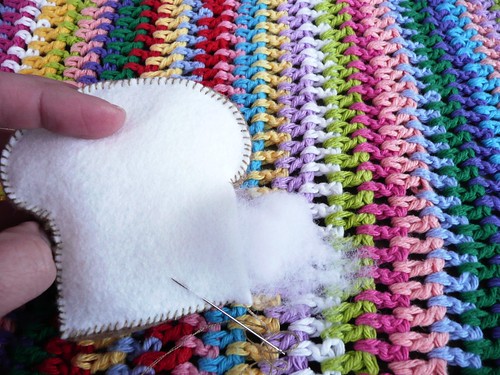
I've gone all the way around on both sides leaving an opening for stuffing and a length of thread for closing it up.
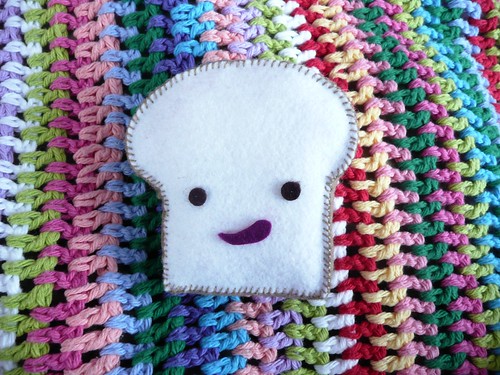
All finished! I like happy faced foods.
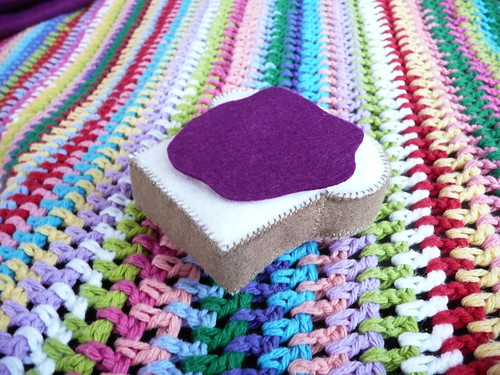
But maybe I'll just do a dollop of jam.
That's it! it's not so hard! Mmmm... I think I'll have jelly toast for breakfast this morning....
I'm looking for felt food patterns for my new swap partner. I love these little books. ISBN 4834763897


Aha! Food patterns! They look cute and easy, but I've made all these before and they are sort of miniature.

This book and others like it have the full sized patterns right there on a separate page. The instructions are on the left side.

That other little book is cute, but I have a book with food patterns galore. This is ISBN 9784529042659

There's hot dogs, hamburgers, cakes, sushi, and much more in this book, but let's try some of those breads. My partner lives in Malaysia, so maybe that Western style slice of white bread will be a good place to start. (And easy enough for this tutorial)

In the back of this book there is a page with the instructions for breads. My bread slice is in the center of the left page. This book is helpful because it has a thumbnail of the bigger photo inspiration page up in each corner.

Okay, that was the easy part.. now I have to go to these inserts and find the patterns for my slice of bread. This book has two inserts that are printed on both sides.

Yipes! I can't read any of this, but I do know that they usually organize the patterns in groupings according to how they are presented in the book.

Egad! This sort of thing is for people with very strong visual perceptual skills, the sort of folks who do well on the section of an aptitude test that measures spatial reasoning. You may be this sort of person if you love putting together Ikea furniture or gas grills.
This is me all the way, so I can see pretty quickly that that bread slice shape is not on this page.

Aha! There it is on the other insert! I can see how this thing will go together. I should cut two white slice shapes and those two long strips will be like gussets, the longer one will stitch along the rounded top and the short one will go around the square bottom.

I trace the shapes onto card stock or white paper. My friend uses a different method, she traces onto tissue or tracing paper and cuts the paper and the felt all together.
Use your lightbox if you have one. I use the sunny window. If it's nighttime, I use the television screen.

Cut out your cardstock template.

Trace onto felt using a light marker or disappearing marker. Layer your felt so you cut 2 shapes at once.

I used a Sharpie... I just carefully trim off any leftover color and turn this side to the inside of my object.

Two white bread shapes. I'll bevel off that little green spot with my scissors.

Parts are all cut! Time to start stitching!

I matched up the center of the brown piece with the center top of the bread slice and I started stitching there.

I use the whip stitch, although blanket stitching is my favorite. I'm using 2 strands of embroidery floss. Floss separates into six separate strands. I use about a 24-inch length on my needle.

Here I've done two matching sides. I'm trying to keep it from going wonky by making sure it'll be lined up.

Hide your knots on the underside. I like to keep my knots close to the seam.

But wait.. let's look and see if there are any special instructions for this thing.
Nope .. no special instructions... I can see where the seams are supposed to go. Again, I can't read Japanese at all. I can read that this is pattern letter "E". That might have helped me find the pattern on the inserts a little bit earlier.

I've gone all the way around on both sides leaving an opening for stuffing and a length of thread for closing it up.

All finished! I like happy faced foods.

But maybe I'll just do a dollop of jam.
That's it! it's not so hard! Mmmm... I think I'll have jelly toast for breakfast this morning....
Wednesday, February 27, 2008
More Die Cut Tests
I came home last night after seeng the play "Gees Bend" with my mom to a new comment on my die cutting adventures.
That's the Crafty Chica, Cathy Cano-Murillo, author and crafty rock star.
Then there was this question this morning:
So here is a few more tests and clarifications.
I don't have any actual template plastic, but I did still have the packaging for my new dies so I took one apart to use as a test. This plastic is pretty much the same as the template stuff you buy at the store as "template plastic".
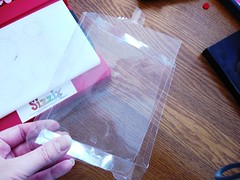
There is sort of a trick to die cutting. I guess I did so much in my teaching days that I forgot how we had to learn how to do it. We probably had a day long session about this, the laminator, and the ins-and-outs of the overhead projector in one of my teacher prep courses. This machine has a smaller presser than the commercial die cutters I've used before.
You layer the material, on top of the little cutting mat and center the die over them both so you'll have a die cut sandwich. I pressed three times moving the sandwich carefully, only touching the plastic cutting board base so the material wouldn't slip. You have to be sure to press the arm all the way down.
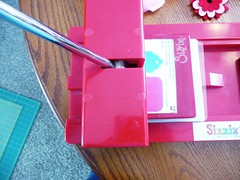
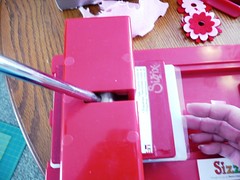
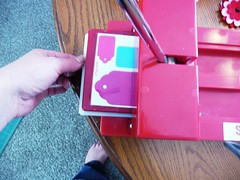
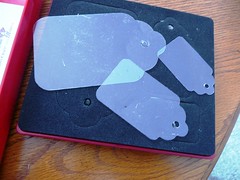
Yes! It cuts template plastic just as well as felt, fabric, and interfaced fabric!
Last night, however, I couldn't sleep, so I watched the second half of the Cricut infomercial. It's probably one of THESE.
It's very alluring and that thing is really popular. It really seems like papercrafting supplies are taking over and needle-and-thread fabric people like me are having a harder and harder time finding our stuff. I guess I don't help things by not buying tools and gadgets very often...
Here's a video of a different product, the Sizzix Big Kick. It's in French, but it's quick.
I think the advantage of this machine is that it doesn't have the big long arm, so it will stow away more easily. It will hold larger dies as well as the smaller ones, but that plastic handle looks flimsy and I don't like to do all that cranking.
Crafty Chica said...
love them!!! i don't know why, but i've never gotten the hang of using a die cut machine, i always do something wrong. i'm a dork, i know! but you have inspired me to try again!!! your tags are just plain COOL!!
That's the Crafty Chica, Cathy Cano-Murillo, author and crafty rock star.
Then there was this question this morning:
Elaine said...
Do you think this machine would do thin plastic for stencils?
So here is a few more tests and clarifications.
I don't have any actual template plastic, but I did still have the packaging for my new dies so I took one apart to use as a test. This plastic is pretty much the same as the template stuff you buy at the store as "template plastic".

There is sort of a trick to die cutting. I guess I did so much in my teaching days that I forgot how we had to learn how to do it. We probably had a day long session about this, the laminator, and the ins-and-outs of the overhead projector in one of my teacher prep courses. This machine has a smaller presser than the commercial die cutters I've used before.
You layer the material, on top of the little cutting mat and center the die over them both so you'll have a die cut sandwich. I pressed three times moving the sandwich carefully, only touching the plastic cutting board base so the material wouldn't slip. You have to be sure to press the arm all the way down.


Yes! It cuts template plastic just as well as felt, fabric, and interfaced fabric!
Last night, however, I couldn't sleep, so I watched the second half of the Cricut infomercial. It's probably one of THESE.
It's very alluring and that thing is really popular. It really seems like papercrafting supplies are taking over and needle-and-thread fabric people like me are having a harder and harder time finding our stuff. I guess I don't help things by not buying tools and gadgets very often...
Here's a video of a different product, the Sizzix Big Kick. It's in French, but it's quick.
I think the advantage of this machine is that it doesn't have the big long arm, so it will stow away more easily. It will hold larger dies as well as the smaller ones, but that plastic handle looks flimsy and I don't like to do all that cranking.
Tuesday, February 26, 2008
Die Cutting Fabric and Felt
I did a quick test drive of my new die cutter yesterday. I have a gently used Sizzix brand "Original Sizzix Machine" made by the Ellison company.
My love affair with the magic of die cutters began back in my old classroom days. Many schools have at least one big die cutting machine made by Ellison and I know those school/commercial models to be true workhorses. The popular die cutter today seems to be the "Cricut". That thing is really expensive and only cuts paper and I don't know, probably vellum and the other supplies papercrafters are really familiar with. Another type is the Cuttlebug. Cuttlebug dies are cheaper, but very thin and I don't know if they can cut felt.
This machine can use many different brands of dies, but I found the type that go with this specific machine. I prefer simple shapes without lots of details, I got these cute tag dies, some flowers, and I have a circle die coming later this week from ebay.

Mom gave me some vintage yardage of pink polyester gingham so I used that for my first test cuts. First I did fabric without any backing or interfacing. It cut perfectly! See! By perfectly, I mean perfectly! Still, though... I need some sort of stiffener or fuseable webbing to use little gingham fabric tags, so I ironed some interfacing on and tried again:
 \
\

Even better! I used one as an identification tag on my tea towel for my new swap going around.
Okay, my friends, now for the real test... felt.
I've been using some heavier duty punches. These are disaster with acrylic felt:
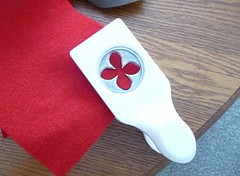

No amount of muscle makes these things go through acrylic or polyester felt.
They do make it through wool/rayon blend felt, but I have to clean up the fuzzies afterwards:

But the die cutter has no trouble with either type of felt:

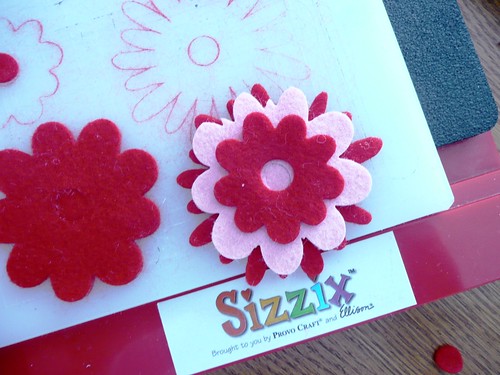
These dies cost about $15 US at JoAnns, but they were on sale for about $9 when I got them. I'm a serious cheapskate, so even that is a bit pricey, but evenly shaped flower petals and perfect, consistent circles are really hard to cut with scissors, so this is worth it to me!
My love affair with the magic of die cutters began back in my old classroom days. Many schools have at least one big die cutting machine made by Ellison and I know those school/commercial models to be true workhorses. The popular die cutter today seems to be the "Cricut". That thing is really expensive and only cuts paper and I don't know, probably vellum and the other supplies papercrafters are really familiar with. Another type is the Cuttlebug. Cuttlebug dies are cheaper, but very thin and I don't know if they can cut felt.
This machine can use many different brands of dies, but I found the type that go with this specific machine. I prefer simple shapes without lots of details, I got these cute tag dies, some flowers, and I have a circle die coming later this week from ebay.

Mom gave me some vintage yardage of pink polyester gingham so I used that for my first test cuts. First I did fabric without any backing or interfacing. It cut perfectly!
 See! By perfectly, I mean perfectly! Still, though... I need some sort of stiffener or fuseable webbing to use little gingham fabric tags, so I ironed some interfacing on and tried again:
 \
\
Even better! I used one as an identification tag on my tea towel for my new swap going around.
Okay, my friends, now for the real test... felt.
I've been using some heavier duty punches. These are disaster with acrylic felt:


No amount of muscle makes these things go through acrylic or polyester felt.
They do make it through wool/rayon blend felt, but I have to clean up the fuzzies afterwards:

But the die cutter has no trouble with either type of felt:


These dies cost about $15 US at JoAnns, but they were on sale for about $9 when I got them. I'm a serious cheapskate, so even that is a bit pricey, but evenly shaped flower petals and perfect, consistent circles are really hard to cut with scissors, so this is worth it to me!
Monday, February 25, 2008
Tea Towel Tour Round 3
I've been out of swaps since the fall and I miss it, so I signed up to be a group captain for a round three Tea Towel Tour over at Craftster.
Alicia over at Posy Gets Cozy posted a great tutorial about binding tea towels HERE. It really does look great, so I got out some vintage style fabric I had a lot of yardage for and cut 2 inch strips on the bias and made my own bias tape.

This tape maker is a Dritz brand and it was a bit of a problem because it kind of slides around when I used it. I want to get a Clover brand one in this one inch width or 3/4 inches will do...
I worked it out and I'm happy with how it turned out. It does work best to cut off the hems of your tea towel, square up your towel, and then bind the raw edges. You'll get less bulk that way.
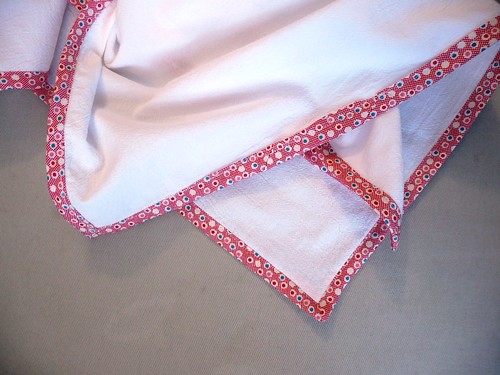
I think I want a kitchen kitsch theme for this towel. You know those old fashioned dancing plates and silly fruits and veggies? Sort of along those lines. I am always happy with what people stitch for me. It's so fun! I'll probably get my first towel from my group to stitch later this week.
I liked this binding so much I did my towel from round 1. I was going to do a last motif for this one, but that looks like it isn't going to happen so it's time to get this towel out of my sewing basket and into the kitchen where it belongs:
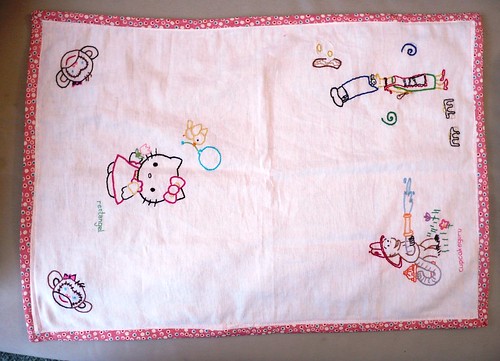
Alicia over at Posy Gets Cozy posted a great tutorial about binding tea towels HERE. It really does look great, so I got out some vintage style fabric I had a lot of yardage for and cut 2 inch strips on the bias and made my own bias tape.

This tape maker is a Dritz brand and it was a bit of a problem because it kind of slides around when I used it. I want to get a Clover brand one in this one inch width or 3/4 inches will do...
I worked it out and I'm happy with how it turned out. It does work best to cut off the hems of your tea towel, square up your towel, and then bind the raw edges. You'll get less bulk that way.

I think I want a kitchen kitsch theme for this towel. You know those old fashioned dancing plates and silly fruits and veggies? Sort of along those lines. I am always happy with what people stitch for me. It's so fun! I'll probably get my first towel from my group to stitch later this week.
I liked this binding so much I did my towel from round 1. I was going to do a last motif for this one, but that looks like it isn't going to happen so it's time to get this towel out of my sewing basket and into the kitchen where it belongs:

Thursday, February 21, 2008
February Craft Collective

Our craft at our February Chicagoland Craft Collective meeting was these cute bunnies. Thanks, Diane! Mine is the one in the center with the yellow ears. I am a traditional direction follower. I envy creative thinkers like Nancy who made the Emo Bunny right next to mine. This was a fun craft. It's hard to come up with simple things we can do in a restaurant with strange lighting and this one was really fun and simple. It's sitting on a little felt penny quilt that Donna made to share with us.
Alex told us about her experience last week as an NIU student during the Valentine's Day shootings there. The students have had the week off since the shootings and she says it was very surreal and the gravity of what happened hasn't really set in yet because they haven't gone back to their classes.
We peeked out at last night's lunar eclipse, but it is really cold here, so we observed it from inside our restaurant venue. Sarah and Martha told us all about going to CHA last week. We are all cheering for Britney's recovery and we don't hold out much hope for Chyna on Celebrity Rehab. Did you know that Britney's hair is about 6 inches long now since it was a year ago that she publicly shaved it all off? I didn't know this juicy fact, but Martha did.
Diane brought a previously used Sizzix die cutter machine for me.
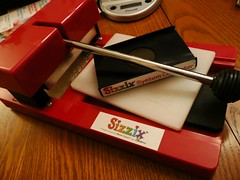 I'm so excited about this new tool! The paddle punches I have are a lot of work to use with my felt, and I think this will be much easier to use. I really want to be able to get consistent circles...
Finally, Sarah read my mind and knew I would want to start getting Cotton Time magazine so she ordered it for me from a local Japanese bookseller and here's a sneak peek at my first issue. Yay!

Wednesday, February 20, 2008
Sewing Machine Song
Did you see this on the Craftzine Blog?
I can relate.. The sewing machine "a girl's best friend...At night I get so weary that I never get out to play".
I did get out tonight to my Chicagoland Craft Collective Meeting. It' so much fun with a great group of people. More about that tomorrow.
I can relate.. The sewing machine "a girl's best friend...At night I get so weary that I never get out to play".
I did get out tonight to my Chicagoland Craft Collective Meeting. It' so much fun with a great group of people. More about that tomorrow.
Sunday, February 17, 2008
Maps
I saw this just now on Sunshine's Blog.
Here's my states in the USA visited. We haven't been out west very much, but we are doing pretty well here. Alaska is our dream destination. We'll get there one day!

create your own visited states map
or check out these Google Hacks.
One day when we are retired, we'll expand our world travels... I wish I had more world traveling done. I missed my chance to study abroad in college and I always wanted to teach overseas, but I married young, and it was impractical for us to do that. My husband is hearing impaired and relies heavily on lip reading, so living overseas is not such a great idea for him. I visited the Dominican Republic and Paraguay when I was a teenager during two summers I spent as a health volunteer. That was a looong time ago...

create your own visited countries map
or vertaling Duits Nederlands
Here's my states in the USA visited. We haven't been out west very much, but we are doing pretty well here. Alaska is our dream destination. We'll get there one day!
create your own visited states map
or check out these Google Hacks.
One day when we are retired, we'll expand our world travels... I wish I had more world traveling done. I missed my chance to study abroad in college and I always wanted to teach overseas, but I married young, and it was impractical for us to do that. My husband is hearing impaired and relies heavily on lip reading, so living overseas is not such a great idea for him. I visited the Dominican Republic and Paraguay when I was a teenager during two summers I spent as a health volunteer. That was a looong time ago...
create your own visited countries map
or vertaling Duits Nederlands
Thursday, February 14, 2008
Pink and Yellow Valentines
Wednesday, February 13, 2008
Valentine Ambivalence
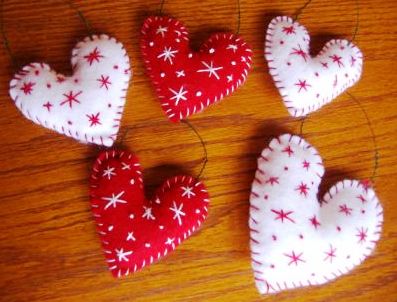
Yipes! Tomorrow is already Valentines Day! My conversation with my husband went like this:
Me: So what should we do for Valentines Day?
Husband: I don't know.. can we skip it?
Now, I suppose this would bother some wives and girlfriends, but not me. Valentine's Day is sweet and all, but I don't really believe in it, although I do like red hearts, chocolate, and flowers. I don't believe in New Year's resolutions either. It seems to me that being sweet to your loved ones or making big changes in your life is something that one should be thinking about all the time. We decided to do a simple card exchange with the kids and have a little meal at home with a chocolatey dessert. We'd both prefer to eat out, but going out on Valentine's Day is such a pain.
My daughter is pretty excited to be making her own cards for her classmates. I recall that as a teacher, the Valentine's party was the funnest. The kids loved opening up all their cards and thanking all the other kids for the candy or nice notes. Even in my inner-city housing project school where the 3rd grade boys were already dabbling in gang membership, the kids were sweet to all their classmates about the Valentines.
The sun is out here (finally) today and boy does it make me feel more energized! Our village hired some sort of excavation company and they are trucking out loads and loads of snow. I think from the areas where the neighborhood kids have to wait for the bus. I wonder where it's all going....
